· engineering · 7 min read
Using Eventbridge Scheduler
EventBridge Scheduler offers one-off events, flexible scheduling, and direct integration capabilities that will simplify and even replace existing time-delayed solutions and Lambda functions.

Table of Contents
Task scheduling is an essential component of many applications, enabling the execution of commands at specified intervals.
This functionality is critical for a variety of tasks, from routine maintenance to essential operations such as queue processing and log rotations.
In AWS, task scheduling was traditionally managed using EventBridge rules, which allowed users to set up schedules for automated tasks.
Recently, Amazon introduced EventBridge Scheduler, an great improvement on EventBridge rules. Scheduler provides similar functionality but with much greater flexibility and configurability, allowing for more precise and efficient scheduling of tasks across AWS environments.
Benfits of Scheduler over Rules
EventBridge Scheduler offers several significant improvements over the EventBridge Rules:
- One Time Events - Scheduler enables the setting of single occurrence events for specific dates and times. This feature is particularly useful for tasks such as sending a follow-up reminder 10 days after an item’s delivery.
- Scale - Unlike the previous limit of 300 rules per region, Scheduler allows up to a million schedules per account by default, supporting thousands of transactions per second.
- Timezones - Scheduler supports all time zones, including adjustments for Daylight Saving Time, which were not available with EventBridge Rules.
- Time Windows - Beyond simple recurring schedules, Scheduler allows for setting time frames. This means tasks can, for example, be configured to run daily during peak seasons and weekly during off-peak times, optimizing resource usage.
- Targets - Scheduler can perform up to 6,000 operations across 270 AWS services directly, potentially eliminating the need for intermediary Lambda functions. This capability is especially powerful for one-time events, such as scheduling a customer-specific email via SES for future delivery without any code.
- Tagging - Instead of applying tags directly to rules, Scheduler allows for the creation of groups to organize schedules, with tags applied to these groups.
- Cost-Effectiveness - With Scheduler, the cost is $1.00 per million scheduled invocations each month, after an initial allotment of 14 million free invocations.
- Error handling - Similar to EventBridge Rules, Scheduler provides configurable retry policies and supports Dead Letter Queues to handle errors effectively.
Disadvantages
Despite its advantages, the Scheduler comes with a few drawbacks:
- Complexity - The setup process for Scheduler is slightly more complex compared to traditional EventBridge Rules
- Tagging - Scheduler’s tagging system only applies to groups, not individual scheduled items. This can be a limitation when using tools like the AWS Cloud Development Kit (CDK), where global tags do not apply to individual schedules if they are placed in the default group.
- Single Target Limitation - Unlike rules, which can direct to multiple targets, each scheduled item in Scheduler can only have one target. While the vastly increased limit on the number of schedules partly mitigates this issue, it may still be seen as a restriction compared to the more flexible targeting options in EventBridge Rules.
Getting started with Scheduler
Creating a schedule is similar to creating an EventBridge rule.
Log into your AWS console, and go to eventbridge , click on “Schedules” in the menu on the left.
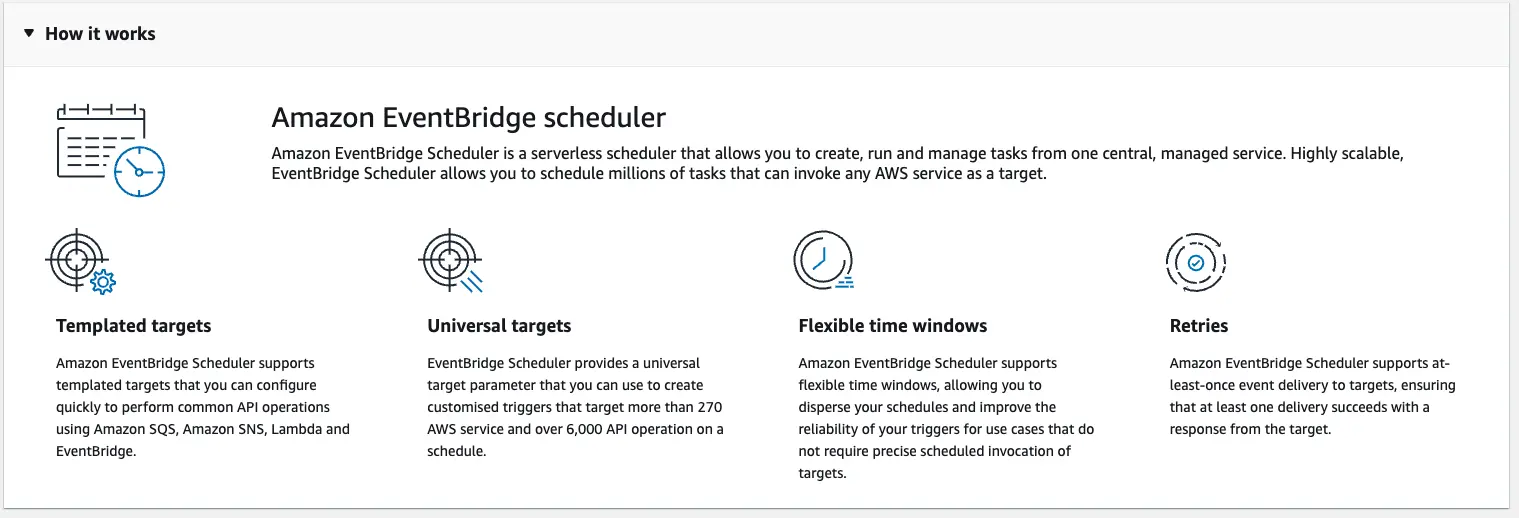
Click Create a schedule, and begin.
First we’ll enter a name, and description for this schedule. Then choose a “schedule group”. Schedule groups are optional, but offer a way of organising and tagging your schedule rules.
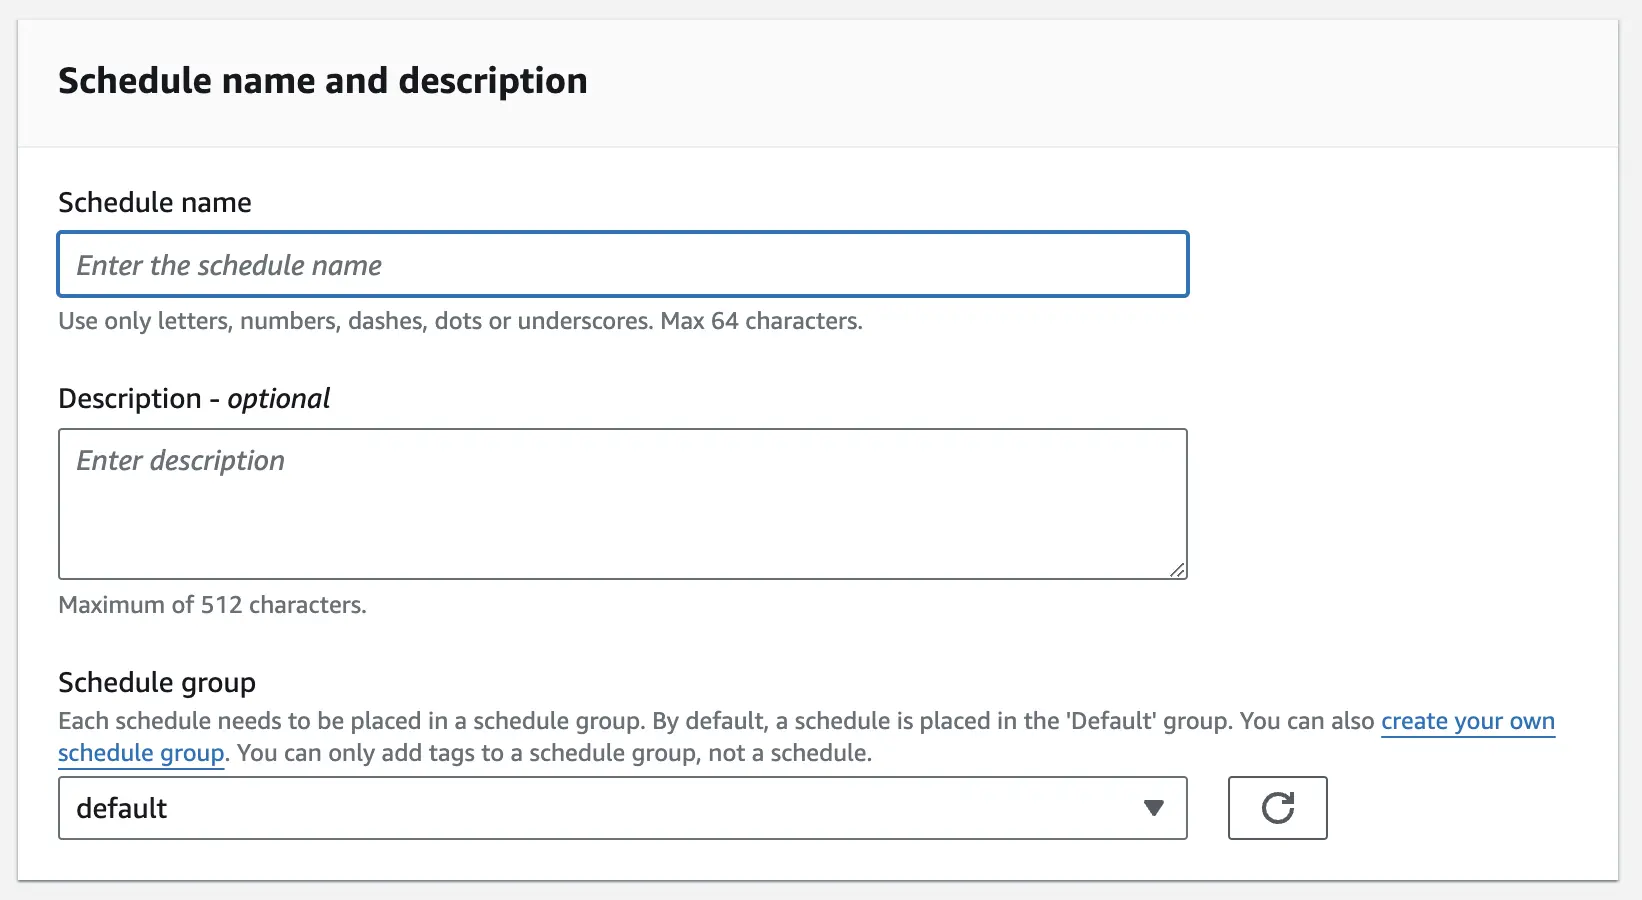
Next we’ll be adding our schedule pattern.
Here we decided if this is a one off, or recurring schedule, for a one-off schedule, we simply specify when the action schould occur. For a recurring schedule, we can either specify a rate (i.e. every 6 hours) or a cron based expresion, allowing us to specify, for example, 9am monday-friday.
For a recurring schedule, we can also specify a timeframe which allows us to set an optional start and/or end date for this recurring schedule.The last option is “Flexible time window”, this allows us to say, for example, that it must be invoked within an hour of the targeted time.
This can be particularly useful if, for example, we’re queuing up order delivery emails to go out at 9am 10 days after the order - to help prevent a peak at exactly 9am, we could use the flexible time window to stagger the sending of these messages across an hour or two.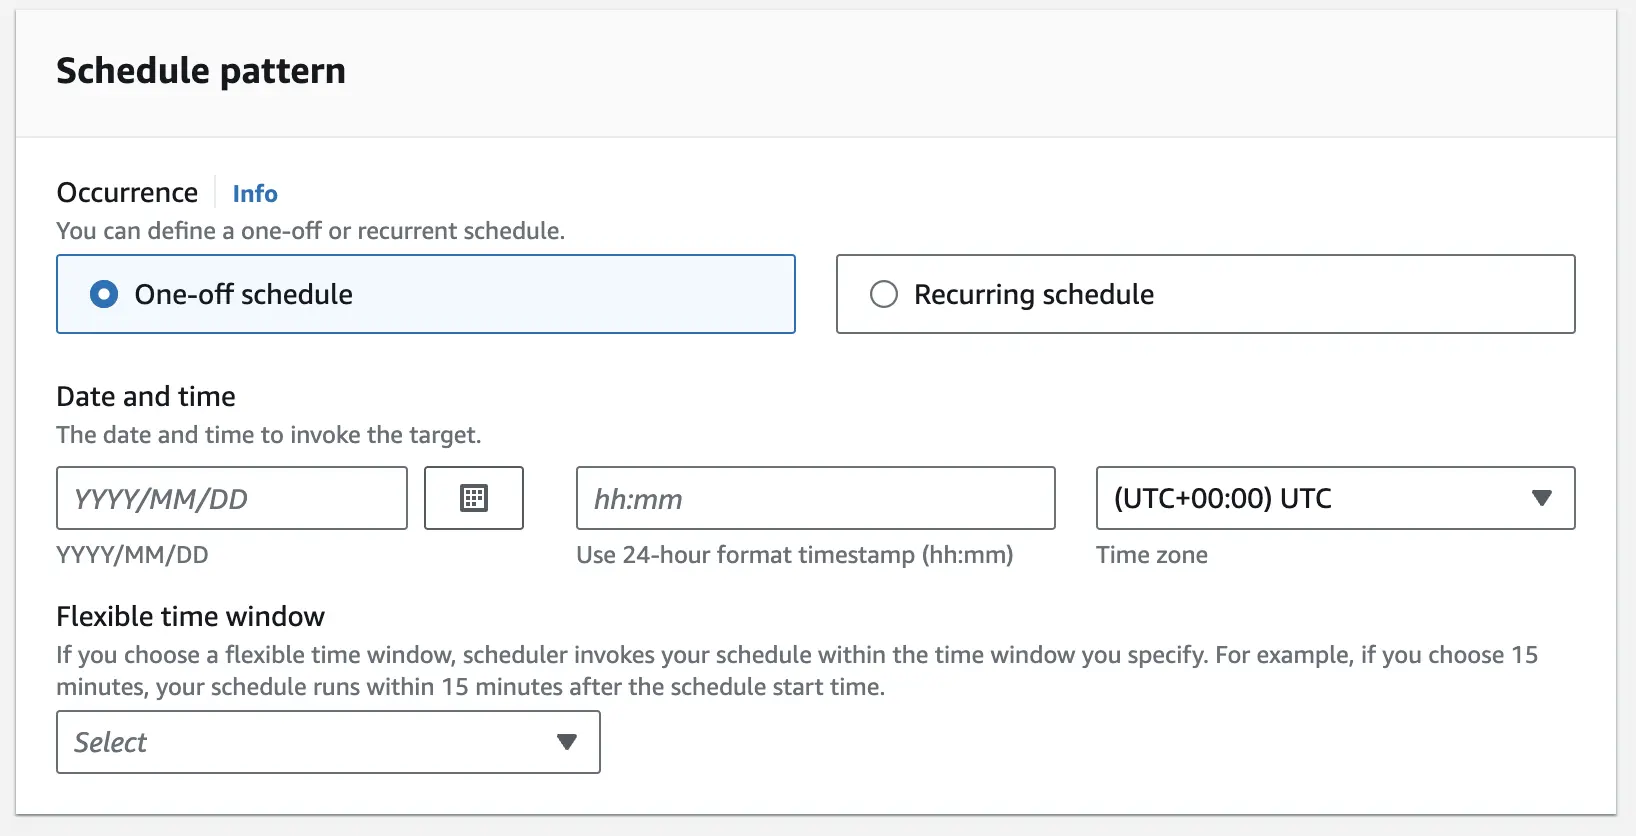
Clicking next, we come to select a target.
Here we can pick from a small number of “templated targets” or “all apis”. Templated targets differ in that they offer a (very basic) form to set up the target action, for example with Lambda Invoke, you can choose which Lambda to invoke from a dropdown and what the payload should be.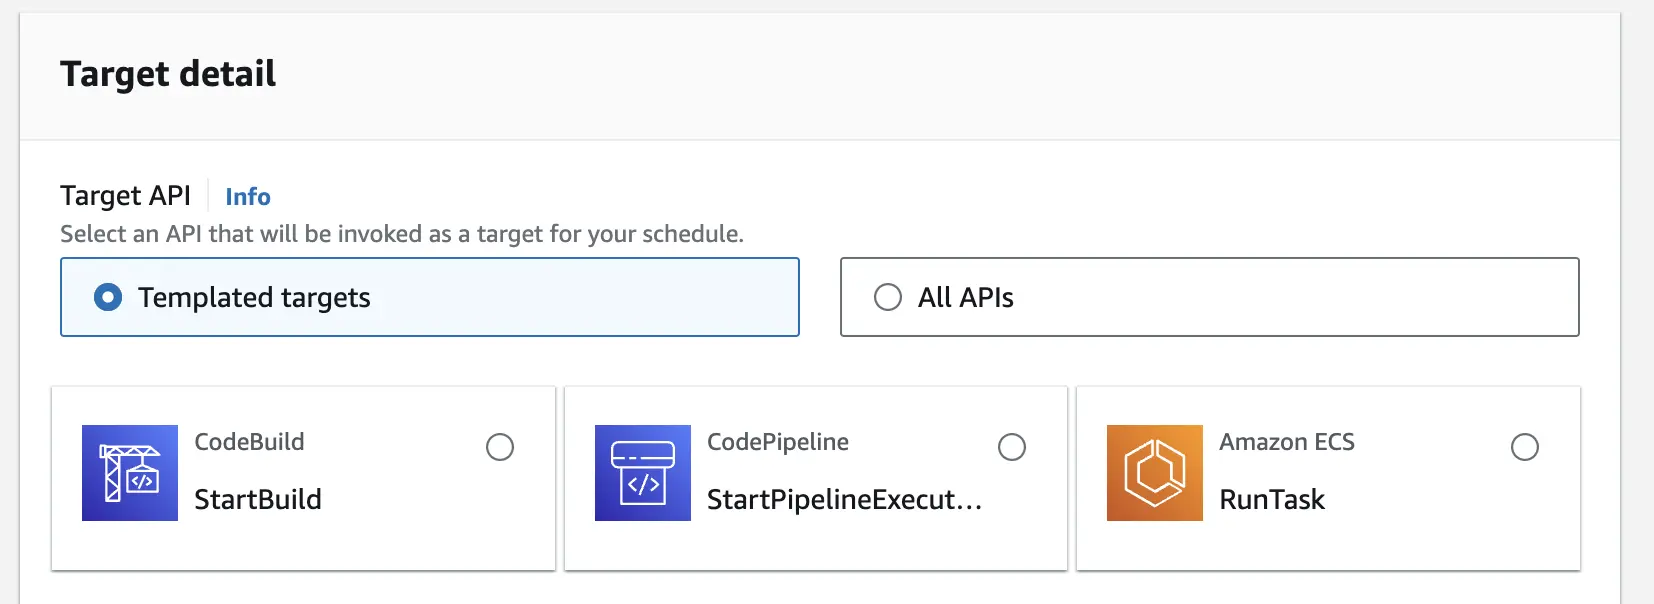
For non templated targets, we need to specify the values for the api call ourselves.
Upon selecting an target service and operation, we are given a field to enter the input - which is what will be sent to the API. Some operations, for example deleting a cloudformation stack, will have documentation for this api. Other services might not.
Where documentation is available, you will see that the “Api” is linked to that documentation in the helper text. If your service is not linked, you only have this helpful phrase from the AWS Docs to guide you:
“The parameters and shape of the JSON you set in Input are determined by the service API your schedule invokes. To find this information, see the API reference for the service you want to target.”We’ll also want to configure our retry policy, and dead letter queue, so we can retry if resources are unavailable (for example a throttled api) but eventually give up and hand it to an SQS queue for further processing.
Scheduler in CDK
Deploying a schedule in CDK is trickier than an using a scheduled rule (though not much) - the documentation has provisions for some common targets as has cloudformation, for example updating ecs parameters, but in most case we’ll need to specify the ARN of the resource, a Role to access it, and the input.
Note: If you are applying tags to your whole stack by passing them via stack props, they will not be applied to your scheduled events. For this we would need to create a group, and put our rules into the group.
/* eslint-disable no-new */
import * as cdk from 'aws-cdk-lib';
import * as iam from 'aws-cdk-lib/aws-iam';
import * as lambda from 'aws-cdk-lib/aws-lambda';
import * as nodeLambda from 'aws-cdk-lib/aws-lambda-nodejs';
import * as scheduler from 'aws-cdk-lib/aws-scheduler';
import { Construct } from 'constructs';

import path = require('path');

export class ResourceListStack extends cdk.Stack {
  constructor(scope: Construct, id: string, props: cdk.StackProps) {
    super(scope, id, props);

    const myLambda = new nodeLambda.NodejsFunction(this, 'myLambda', {
      entry: path.join(__dirname, '.', 'src/myLambda.ts'),
      handler: 'handler',
      timeout: cdk.Duration.seconds(30),
      memorySize: 1024,
      runtime: lambda.Runtime.NODEJS_18_X,
    });

    const scheduleRole = new iam.Role(this, 'scheduleRole', {
      assumedBy: new iam.ServicePrincipal('scheduler.amazonaws.com'),
    });
    scheduleRole.addToPolicy(
      new iam.PolicyStatement({
        effect: iam.Effect.ALLOW,
        actions: ['lambda:InvokeFunction'],
        resources: [myLambda.functionArn],
      })
    );

    const schedule = new scheduler.CfnSchedule(this, 'redeployCheckSchedule', {
      flexibleTimeWindow: {
        mode: 'OFF',
      },
      scheduleExpression: 'cron(0 * * * ? *)',
      target: {
        arn: myLambda.functionArn,
        roleArn: scheduleRole.roleArn,
      },
    });
  }
}
Scheduler in Cloudformation
We can do a similar thing in Cloudformation, again there are provisions for some common use cases.
AWSTemplateFormatVersion: 2010-09-09
Parameters:
  ExecutionArn:
    Type: String
    Description: The ARN of the target to execute
  RoleArn:
    Type: String
    Description: The ARN of the role to assume

Resources:
  MyGroup:
    Type: AWS::Scheduler::ScheduleGroup
    Properties:
      Name: String
      Tags:
        - Key: Usage
          Value: Test
  ScheduledItem:
    Type: AWS::Scheduler::Schedule
    Properties:
      Description: String
      EndDate: String
      FlexibleTimeWindow:
        Mode: 'OFF'
      GroupName: !Ref MyGroup
      ScheduleExpression: rate(5 minutes)
      Target:
        Arn: !Ref ExecutionArn
        RoleArn: !Ref RoleArn
        Input: tbc
Conclusion
EventBridge Scheduler is a fantastic enhancement to the event-driven capabilities of AWS.
Its ability to create one-off events, stagger invocations through flexible time windows, and directly target a vast array of AWS services not only simplifies but also potentially replaces many existing solutions, particularly for time-delayed events.




No comments yet. Be the first to comment!